AI Microservices - Introduction
Building AI-powered applications at the edge has never been easier!
Jetson AI Lab now offers a collection of pre-built containers, each functioning as a local AI microservice , designed to bring flexibility, efficiency, and scalability to your projects.
A
microservice
is a small, independent, and loosely coupled software component that performs a specific function.
In the
Models
section of Jetson AI Lab, you'll find AI inference services accessible through a standardized REST API.
These local AI microservices are powerful building blocks that enable you to create cutting-edge edge AI applications with ease. Whether you're working on robotics, vision, or intelligent automation, you now have the tools to accelerate innovation.
Let’s build something amazing together! 💡✨
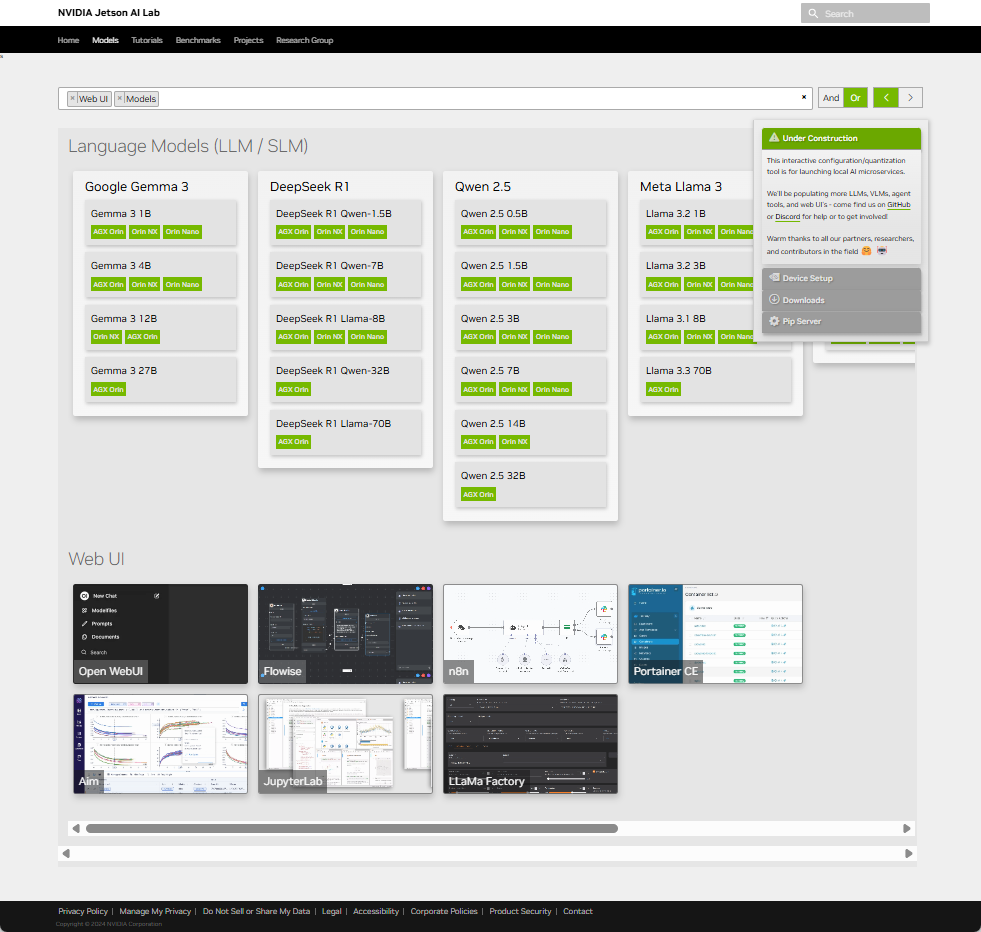
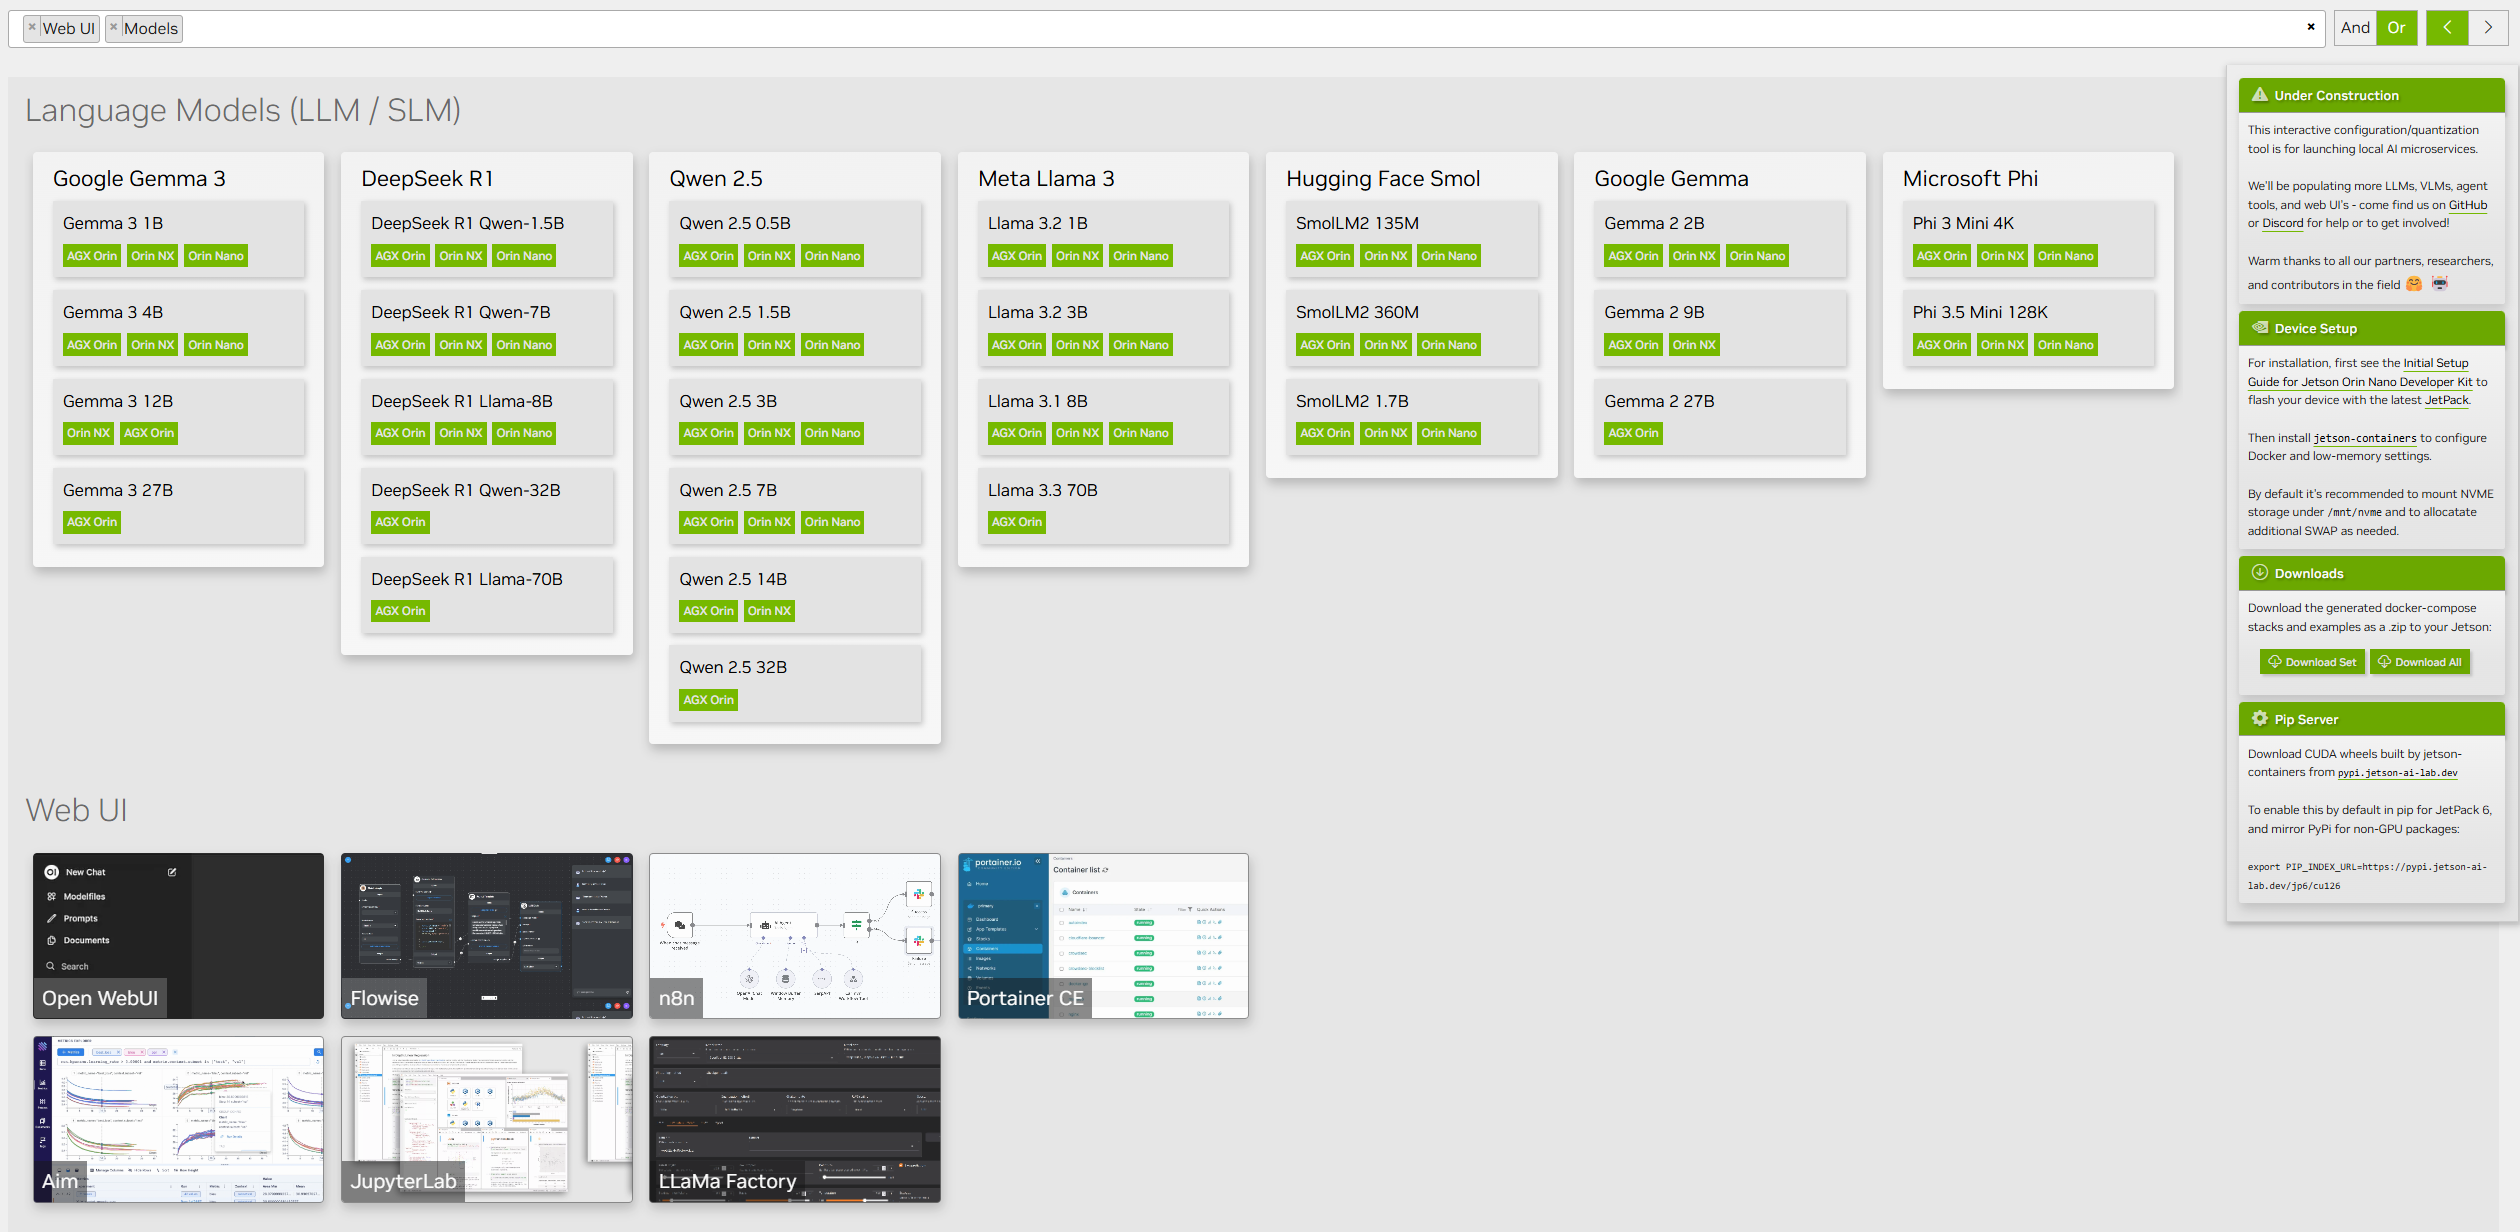
Catalog
Info
Currently, following models and Web UIs are listed.
Launch the Microservice Server
Walk-through video
Steps
- Go to Models section of Jetson AI Lab
- Click the model of your interest (specifically, the small green box representing different Orin modules) to open the model card
- Check the parameter, change as needed, and click on the ("Copy to clipboard") icon in the code snippet under the " Docker Run " section
-
Paste the
docker runcommand in Jetson terminal and execute -
Once you see a line like the following (for the case of MLC based service), the server is up and ready
INFO: Uvicorn running on http://0.0.0.0:9000 (Press CTRL+C to quit)
API Endpoints
| Method | Endpoint | Description |
|---|---|---|
GET
|
/v1/models
|
Get a list of models available |
POST
|
/v1/chat/completions
|
Get a response from the model using a prompt |
Example
curl
commands
/v1/models
-
Execute the following on a Jetson terminal
curl http://0.0.0.0:9000/v1/models -
Check the output. It should show something like the following.
{
"object": "list",
    "data": [
        {
        "id": "DeepSeek-R1-Distill-Qwen-1.5B-q4f16_ft-MLC",
        "created": 1741991907,
        "object": "model",
        "owned_by": "MLC-LLM"
        }
    ]
}
Note
For the
/v1/models
endpoint usage, you can reference the OpenAI doc page like
this
.
get https://api.openai.com/v1/models
Note that you need to substitute the base URL (
https://api.openai.com/
with
http://0.0.0.0:9000
), and you don't need to provide the authorization field.
/v1/chat/completions
-
Execute the following on a Jetson terminal
curl http://0.0.0.0:9000/v1/chat/completions \
-H "Content-Type: application/json" \
-d '{
    "messages": [
    {
        "role": "system",
        "content": "You are a helpful assistant."
    },
    {
        "role": "user",
        "content": "Hello!"
    }
    ]
}'
Tip
You can find the model
curlcommand in a couple of ways.OpenAI API Reference Docs provides examples for combinations of their API requests .
You can use their
curlcommand, replace the base URL and remove the authorization header andmodelfield, but you can see it's essentially compatible.This is something demonstrated in the walk-through video .
Each model card on Jetson AI Lab provides the " Curl Request " example, along with " Performance Benchmark " and " Curl Request "
docker runcommands.
-
Check the output. It should show something like the following.
{
"id": "chatcmpl-9439e77a205a4ef3bc2d050a73a6e30b",
"choices": [
    {
    "finish_reason": "stop",
    "index": 0,
    "message": {
        "content": "<think>\nAlright, the user greeted me with \"Hello!\" and then added \"hi\". I should respond politely and clearly. I want to make sure they feel comfortable and open to any further conversation.\n\nI'll start with a friendly greeting, maybe \"Hello!\" or \"Hi there?\" to keep it consistent. Then, I'll ask how I can assist them, which is important to build trust. I should mention that I'm here to help with any questions, comments, or suggestions they might have.\n\nI also want to invite them to ask anything, so I'll make sure to keep the door open for future interaction. I'll keep the tone friendly and supportive, avoiding any abrupt requests.\n\nSo, putting it all together, I'll have a clear and concise response that's helpful and inviting.\n</think>\n\nHello! I'm here to help with any questions, comments, or suggestions you have. Keep asking anything you like, and I'll do my best to assist!",
        "role": "assistant",
        "name": null,
        "tool_calls": null,
        "tool_call_id": null
    },
    "logprobs": null
    }
],
"created": 1741993253,
"model": null,
"system_fingerprint": "",
"object": "chat.completion",
"usage": {
    "prompt_tokens": 11,
    "completion_tokens": 196,
    "total_tokens": 207,
    "extra": null
}
}
Example Python scripts
Example with Open WebUI
- Go to Models section of Jetson AI Lab
- Go to Web UI section, and click " Open WebUI " card
-
Check the parameter, change as needed, and click on the
("Copy to clipboard")
icon in the code snippet under the "
Docker Run
" section
-
Note the "
Server IP / Port
" section. The default is
0.0.0.0:8080.
-
Note the "
Server IP / Port
" section. The default is
-
Paste the
docker runcommand in Jetson terminal and executedocker run -it --rm \ --name open-webui \ --network=host \ -e PORT=8080 \ -e ENABLE_OPENAI_API=True \ -e ENABLE_OLLAMA_API=False \ -e OPENAI_API_BASE_URL=http://0.0.0.0:9000/v1 \ -e OPENAI_API_KEY=foo \ -e AUDIO_STT_ENGINE=openai \ -e AUDIO_TTS_ENGINE=openai \ -e AUDIO_STT_OPENAI_API_BASE_URL=http://0.0.0.0:8990/v1 \ -e AUDIO_TTS_OPENAI_API_BASE_URL=http://0.0.0.0:8995/v1 \ -v /mnt/nvme/cache/open-webui:/app/backend/data \ -e DOCKER_PULL=always --pull always \ -e HF_HUB_CACHE=/root/.cache/huggingface \ -v /mnt/nvme/cache:/root/.cache \ ghcr.io/open-webui/open-webui:main -
Once you see a line like the following, the Open WebUI server should be ready
INFO: Started server process [1] INFO: Waiting for application startup. -
On a web browser on a PC (that is on the same network as Jetson), access
http://<JETSON_IP>:8080/ -
Sign in (if you have not, create an account first).
- For the detail, read this note from our Open WebUI tutorial .
- Check the selected model
- Type your query in the chat box and check the response.
Tip
You can check out the walk-through video (in the next " Walk-through video " tab ) for details.